
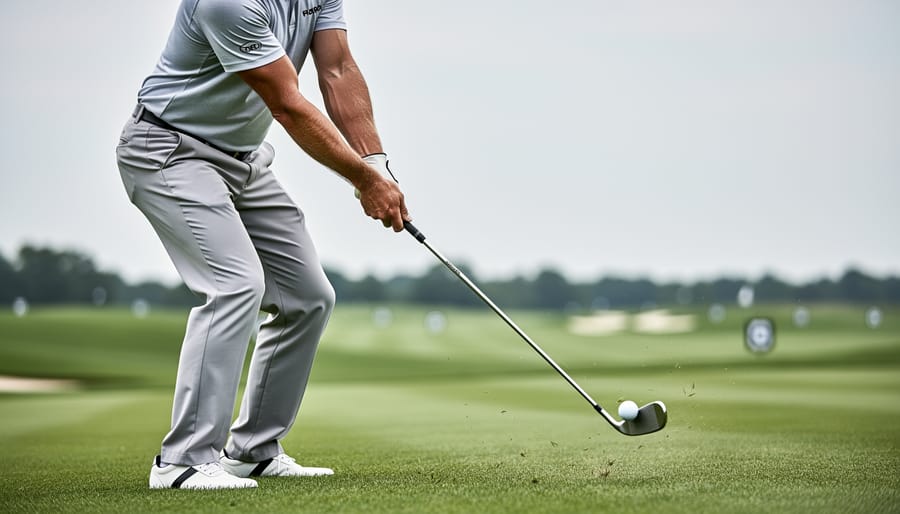
The most efficient way to strike solid, consistent golf shots is to master impact position: your hips shifted forward, weight on your lead leg, hands ahead of the clubhead, and the shaft angled slightly toward the target. Tour-level players move their hips roughly 3.1 inches toward the target at impact, creating the powerful compression and control that separates great ball-strikers from everyone else. You don’t need years of practice to get there. Josh Troyer’s parallel-to-parallel drill, practiced for just ten minutes a few times a week, will train your body to find this position naturally.
Why does impact matter so much? Because everything before it is preparation, and everything after it is consequence. You can have a beautiful backswing and still hit weak, inconsistent shots if your body and club aren’t properly aligned when the clubface meets the ball. The good news: impact position is learnable. By focusing on a few key checkpoints, weight shift toward the target, hip rotation, and hand position ahead of the ball, you’ll start compressing your irons and finding the center of the clubface more often. This guide walks you through the exact steps, with checkpoints to verify you’re on track and quick fixes for the most common mistakes.
Why Impact Position Is the Foundation of Consistent Ball Striking
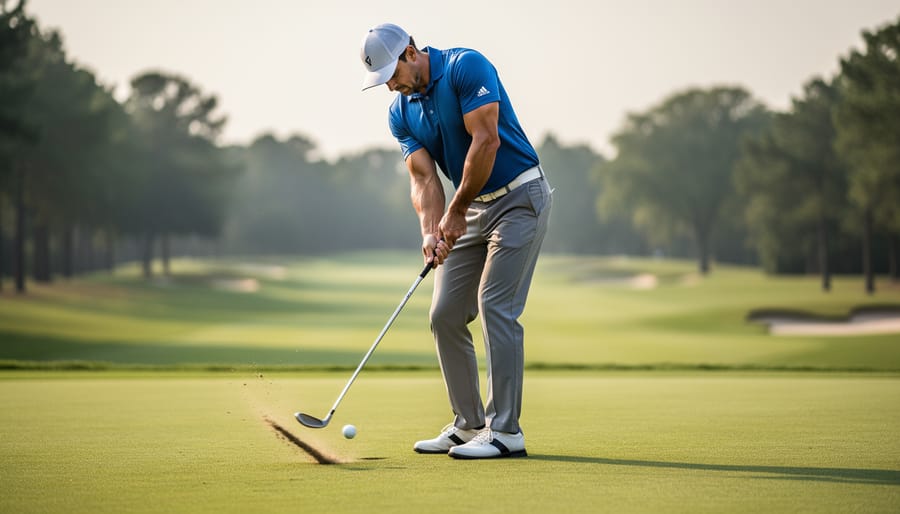
Impact position is where your golf swing lives or dies. Everything you do before contact, your backswing, your tempo, your grip, matters only if you deliver the clubhead properly at the moment of truth. That split second determines whether the ball flies straight and far or curves into trouble. If your impact position is solid, you’ll see better distance, tighter accuracy, and more consistent ball flight. If it’s off, you’ll struggle no matter how good the rest of your swing looks.
What separates great ball strikers from inconsistent ones? Top golfers move their hips and lead knee significantly toward the target during the downswing, creating pressure on the lead leg at contact. This forward weight transfer isn’t subtle, research shows elite players shift their hips roughly 3.1 inches toward the target at impact. That forward movement, combined with proper shaft alignment, produces the compression and control you see on tour.
You don’t need to be a scratch golfer to understand or apply this. The mechanics are straightforward: shift your hips, get your weight forward, and align the shaft so your hands are slightly ahead of the ball. When you nail these positions, the club naturally delivers a descending blow that maximizes energy transfer. The result? Crisper contact, better trajectory, and shots that feel, and fly, differently. Mastering impact position isn’t about perfection; it’s about building a reliable foundation you can repeat round after round.
What You’ll Need to Practice Your Impact Position

You don’t need much to start improving your impact position. The beauty of the parallel-to-parallel drill is its simplicity, most of what you need, you probably already have. Whether you’re at home, in your backyard, or at Cornerstone, you can practice this drill with minimal setup and see real results.
Here’s what you’ll need:
- A golf club (any iron works, though a 7-iron is ideal for balance and feel)
- A practice space with enough room to make half swings, indoors or outdoors
- A mirror or smartphone camera to record and review your positions
- Optional: alignment sticks or headcovers to mark your stance and ball position
The mirror or camera is especially helpful for checking that your hips are shifting forward and your hands are ahead of the club at impact. You don’t need expensive technology or a full golf simulator. A simple phone propped on a chair works perfectly. If you’re practicing at Cornerstone, our instructors can provide feedback and help you dial in the right positions, but the drill itself is designed to be repeatable anywhere, anytime.
Setting Up for Success: Posture and Alignment Checkpoints
Before you even think about the drill, your setup determines whether you’ll succeed or struggle. A few small adjustments now can unlock the impact position you’re after, while common setup flaws will sabotage your progress before you take the club back.
Start with your stance width roughly shoulder-width apart. This provides a stable base without restricting hip movement. Too narrow and you’ll lose balance; too wide and you’ll limit the rotation needed to shift your weight properly. Your lead foot should point straight ahead, not flared out toward the target. This might feel unusual if you’ve always opened that foot, but it’s crucial for the mechanics we’re building.
Ball position depends on the club you’re using, but for mid-irons during practice, place it just forward of center. This gives you room to shift your hips toward the target while still catching the ball with a descending blow. Check your grip next. You don’t need a perfect textbook grip, but your hands should work together without excessive tension. A relaxed grip allows the natural movements we’ll practice in the drill.
Finally, stand tall with a slight bend from your hips, not your waist. Your arms should hang naturally. Many golfers hunch over or reach too far for the ball, which forces compensations during the swing. Set up with balance and comfort, then verify these checkpoints in a mirror or with your phone camera before starting the parallel-to-parallel drill.
Step-by-Step: The Parallel-to-Parallel Drill for Impact Position
Step 1: Start with Half Swings from Hip High
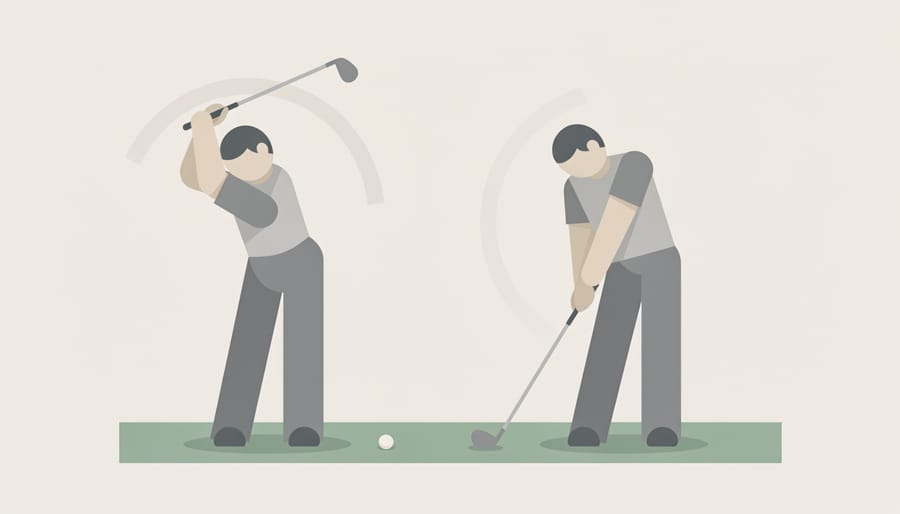
Start by taking your club and positioning the shaft parallel to the ground at hip height, imagine the clubhead pointing straight out in front of you. This is your starting position for every practice swing. From here, you’ll make a short backswing to the opposite parallel (shaft at hip height behind you), then swing through to the follow-through parallel. The beauty of this abbreviated motion is that it strips away the noise of a full swing and forces you to focus on what really matters: how your body and club move through impact.
Half swings from hip high isolate the critical zone where contact happens. You’re not worried about your takeaway or finish, just the mechanics of shifting weight, rotating your hips, and delivering the club correctly. This controlled environment lets you feel the proper sequencing without the speed and timing demands of a full swing. You’ll build the foundation here, then scale it up. If you catch yourself making wild, fast swings, slow down. The goal is precision and awareness, not power. Even tour players use this drill to dial in their impact position before stepping onto the course.
Step 2: Bump Your Hips Toward the Target
From your hip-high starting position, the next move is simple but crucial: bump your hips toward the target. Think of it as a subtle lateral slide, not a sway, but a deliberate shift forward. Tour-level golfers move their hips about 3.1 inches toward the target at impact, and while you don’t need to measure it precisely, you should feel a noticeable weight transfer onto your lead leg.
As you shift, pay attention to where the pressure builds. You’ll sense it in the inside of your lead foot and thigh, that’s your body stacking into impact position. Your trail knee will naturally move forward slightly, but your upper body stays quiet. You’re not lunging or leaning; you’re shifting your lower body first.
To know you’re doing it right, pause mid-shift and check: Is most of your weight on your lead leg? Does your belt buckle point slightly left of the ball (for right-handers)? If yes, you’re on track. If you still feel balanced evenly between both feet, push that hip bump a little farther until the sensation becomes unmistakable.
Step 3: Align the Shaft and Hands Correctly
Once your hips have shifted forward and pressure builds on your lead leg, you need to check your shaft and hand position. The club shaft should sit slightly to the right of your hands (for right-handed golfers), creating what instructors call shaft lean at impact. This forward lean is crucial, it’s what compresses the ball against the turf and produces solid, penetrating shots. Your hands lead the clubhead through impact, not the other way around. Think of it as pressing the handle ahead while the clubface trails behind. This position naturally comes from proper wrist hinge and hip rotation working together. If the shaft points left of your hands or sits vertical, you’re flipping the club and losing compression. Hold the position and check: shaft angled toward the target, hands ahead of the ball, weight forward. That’s the alignment every consistent ball-striker shares.
Step 4: Simulate and Exaggerate Impact
Now freeze in place. Stop at impact and really feel what’s happening, this is where you turn awareness into muscle memory.
Your weight should be stacked on your lead leg, hips clearly shifted toward the target, and your hands noticeably ahead of where the ball would be. The club shaft leans forward, not backward. Hold this position for a few seconds and scan your body: pressure on the inside of your lead foot, trail shoulder lower than lead, chest facing slightly left of the ball.
Here’s the key: exaggerate everything at first. Push your hips even farther forward than feels comfortable. Get your hands way ahead. Make it feel awkward and overstated. This overemphasis helps you recognize the correct sensation, especially if you’ve been hanging back or flipping the club for years. Your brain needs a clear contrast to lock in the movement.
After a few exaggerated holds, dial it back to a more natural feel. You’re teaching your body where impact lives, and repetition at this checkpoint ensures you won’t revert to old habits when you speed things up.
Step 5: Repeat to Build Muscle Memory
Repetition is where the magic happens. You won’t master impact position in one session, muscle memory forms through consistent, deliberate practice. Set aside five to ten minutes three or four times a week to run through the parallel-to-parallel drill. Quality beats quantity here: twenty focused reps with full attention will do more for your swing than a hundred distracted ones.
As you repeat the drill, your body starts to recognize the correct sensations, the pressure on your lead leg, the hip shift forward, the hands-ahead position. What felt awkward at first gradually becomes automatic. Over time, you’ll carry this movement into your full swings without thinking about it. Your downswing will naturally flow toward that solid impact position, and you’ll feel the difference in contact quality immediately.
Track your progress with occasional video checks or practice in front of a mirror. If you hit a plateau, break the drill back down to its individual steps and exaggerate each movement again. The goal isn’t perfection overnight, it’s steady improvement that compounds over weeks and months, building a reliable, repeating swing you can trust on the course.
How to Verify You’re in the Right Impact Position
Once you’ve practiced the parallel-to-parallel drill, take a moment to check your position. Here’s how to confirm you’re getting it right:
Your Verification Checklist:
- About 70-80% of your weight should press into your lead leg and foot, you should feel stable, not balanced evenly between both feet.
- Your hips have shifted forward toward the target (remember that 3.1-inch movement tour players make), not stayed centered or hung back.
- The club shaft leans slightly toward the target, with your hands positioned ahead of the ball or club head.
- Your lead knee and hip have rotated open, creating space for the club to swing through impact.
- Contact feels crisp and solid, with the ball compressing against the face rather than scooping or thin contact.
Use your phone to record swings from down the line, pause the video at impact and compare your position against the checklist. A mirror works great for slow-motion rehearsals, letting you freeze and adjust in real time. If you’re practicing at Cornerstone, ask one of our instructors to watch a few swings. Sometimes an outside eye catches details you’ll miss on your own, and our coaches can suggest small tweaks that make a big difference. The goal is not perfection on day one, it’s building awareness of what correct impact feels like so you can repeat it consistently.
Common Mistakes and How to Fix Them
Even experienced golfers struggle with impact position when old habits creep in. The good news is that most mistakes are easy to spot and fix with a few targeted adjustments.
Hanging back on your trail leg is the most common error. If your weight stays on your right side (for right-handed golfers) through impact, you’ll hit behind the ball or scoop it into the air. The fix: focus on the hip bump drill from the parallel-to-parallel practice. Feel your pressure shift decisively onto your lead leg before the club reaches the ball. Exaggerate the movement during practice swings until it becomes automatic.
Flipping the club happens when your hands fall behind the clubhead at impact, adding loft and killing distance. This often stems from trying to help the ball into the air. The solution: practice half swings while keeping the shaft slightly right of your hands at impact, just as Josh Troyer demonstrates in the parallel-to-parallel drill. Hold that position and feel your hands leading the clubhead through the strike.
Insufficient hip rotation robs you of power and consistency. If your hips don’t shift and turn toward the target, your arms have to work overtime. Revisit the 3.1-inch hip shift benchmark that tour players achieve. Practice bump-and-turn movements slowly, then gradually add speed as the motion feels natural.
Frequently Asked Questions About Impact Position
How long does it take to see improvement in my impact position?
Most golfers notice better contact within a week or two of daily practice with the parallel-to-parallel drill. Expect the new pattern to feel comfortable and automatic after three to four weeks of consistent repetition, though everyone progresses at their own pace.
Can beginners do this drill, or is it only for experienced players?
Beginners can absolutely benefit from this drill. The half-swing approach strips away complexity and focuses on the fundamentals of solid contact. If you’re new to golf or just getting started at Cornerstone, this drill teaches you the right impact mechanics from day one.
How does impact position affect distance and accuracy?
A proper impact position, with your hips shifted forward, weight on your lead leg, and hands ahead of the ball, compresses the ball against the clubface, creating more speed and a penetrating flight. This setup also squares the face more consistently, which tightens your shot dispersion and reduces those frustrating misses left or right.
What’s the difference between impact position and follow-through?
Impact is the split-second moment of contact, where the club meets the ball and determines the quality of the shot. Follow-through happens after impact and reflects the momentum of your swing, but it doesn’t change what the ball does, the outcome is already set at impact. That’s why mastering this position is so critical, whether you’re working on a single-plane swing or a traditional method.
These answers reflect what golfers at all levels experience when they commit to deliberate practice. The parallel-to-parallel drill works because it isolates the impact moment and builds muscle memory through focused repetition. If you have more questions or want personalized feedback, reach out to one of our instructors at Cornerstone, they can watch your swing in person or on video and help you refine each checkpoint until it clicks.
Mastering your impact position doesn’t require years of experience or elite athleticism, it’s a skill within reach for every golfer willing to commit to deliberate practice. The parallel-to-parallel drill gives you a clear, repeatable framework to build the hip shift, weight transfer, and shaft alignment that separate solid contact from inconsistent ball striking. Start with short practice sessions, focus on feeling the correct positions rather than chasing perfect mechanics, and let muscle memory develop naturally over time.
At Cornerstone, you’re never refining your game alone. Our instructors can provide personalized feedback on your impact position, helping you spot subtle adjustments that make an immediate difference. Video analysis during a lesson reveals exactly where your hips, hands, and shaft alignment sit at contact, giving you concrete checkpoints to work from. Beyond individual improvement, our club events and group clinics create opportunities to share what you’re learning, compare notes with fellow members, and celebrate progress together.
Impact position connects directly to the modern fundamentals that underpin every reliable swing. Practice the drill regularly, ask for feedback, and join us on the course, you’ll see the difference in your contact, consistency, and confidence.